How To Setup Flutterwave On WooCommerce
Updated 20 months ago
Integrating Flutterwave with your WooCommerce store is a great way to offer your customers multiple payment options. We have created a step-by-step guide to help you through the integration process. You can also watch our WooCommerce integration tutorial on YouTube for a visual guide.
Step 1: Sign up for a Flutterwave account:
Visit onboarding.flutterwave.com/signup to create a Flutterwave for Business account if you don’t have one. You need an account to integrate Flutterwave into your WooCommerce store.
Step 2: Install the Flutterwave WooCommerce plugin:
Log into your WooCommerce admin dashboard.
Go to “Plugins” on your dashboard.
Search for "Flutterwave WooCommerce" and install the official plugin.
Activate the plugin once it's installed.

Step 3: Configure the plugin and get your API Keys:
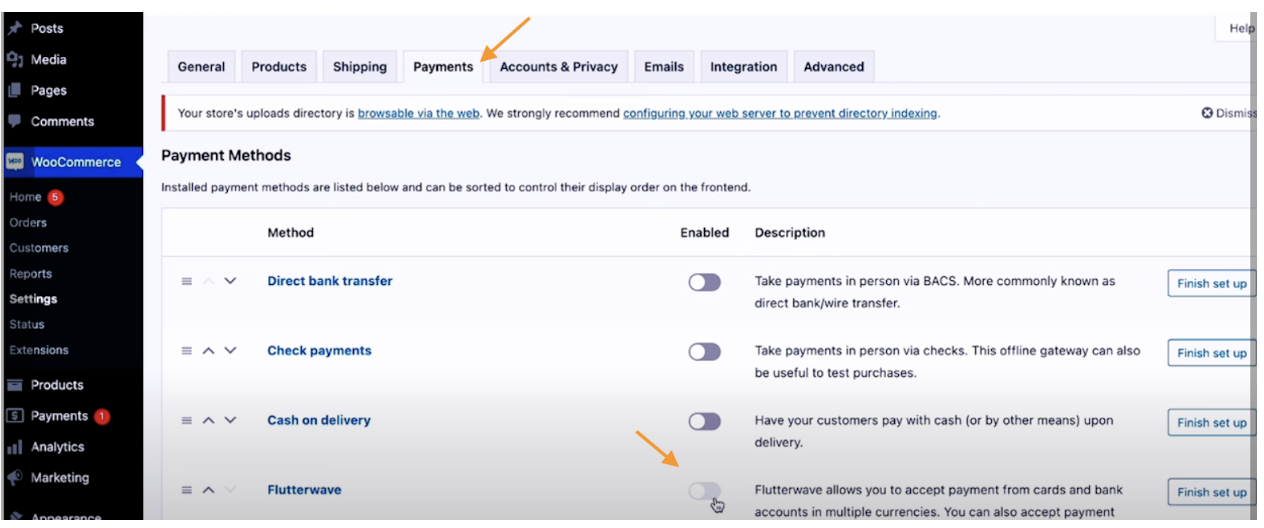
After activating the plugin, go to WooCommerce > Settings > Payments.
Enable Flutterwave as a payment option and complete the setup.

Login to your Flutterwave dashboard. Ensure your account is live to receive real payments. You must have completed your onboarding and submitted all required documents for your account to be live.
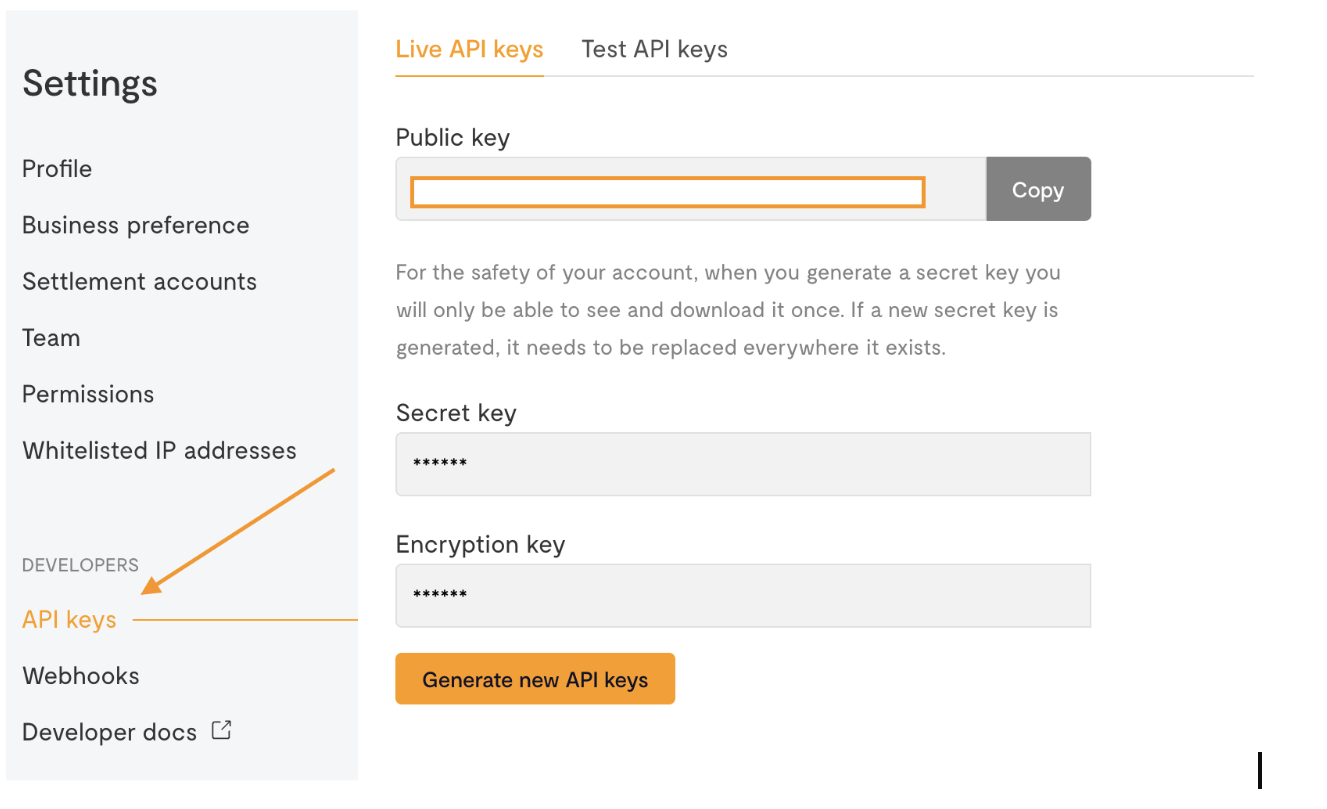
Get your Flutterwave API keys from your Flutterwave dashboard under Settings > API Keys.

Step 4: Secure your integration with webhooks:
Generate a webhook URL in the plugin settings and paste it into your Flutterwave dashboard under Webhooks.
Optional but important, add a hash for webhook encryption. This hash acts like a password, encrypting your payment communication with Flutterwave to keep your data safe. Ensure the webhook URL and hash match between WooCommerce and Flutterwave for seamless communication.
Step 5: Test your installation:
Before going live, it's essential to test the integration to ensure everything works correctly so your customers enjoy a seamless checkout experience.
You can do this by placing a test order on your WooCommerce store and completing the payment using Flutterwave.
Step 6: Go live and start accepting payments:
Once you've confirmed that the integration works fine, you're all set to accept payments from your customers!
For more detailed instructions and troubleshooting tips, refer to our official Documentation here.
Still Have Questions? We're Here to Help!
Feel free to contact us if you have any more questions or run into any issues during the integration process. We're always here to help!
We'd like to hear from you
Suggest the type of support articles you'd like to see
Still need help?
Get in touch if you have more questions that haven’t been answered here