Flutterwave + Sage
Learn how to Integrate Flutterwave with Sage in 8 easy steps.
Flutterwave provides online payment services where individuals and enterprises can receive and disburse payment in a seamless and easy way. Flutterwave + Sage integration enables the merchant to track their sales and consolidated payments they receive on a daily basis. Get the most out of Financials with the power of Salesforce APIs on Sage.
Why Integrate Flutterwave with Sage?
Track payments you receive on sales through your Flutterwave account. All these transactions are a virtual projection in your Sage account, paving way for an easy reconciliation process.
- Track all transactions taking place in your Flutterwave account through Sage.
- Track sales that occur in Sage through your Flutterwave account.
- Flutterwave + Sage integration gives merchants access to easy cash flow reconciliation of marketplaces transactions all at a glance.
- Get accurate and efficient balancing of accounts with reduced deficit on all accounts statements.
- Track the amount Flutterwave owes you for any transaction.
- Track the fees Flutterwave charges you.
- Merchants get payments into an added bank account on Sage while awaiting an agreed-upon settlement. This is not technically a loan but an advance against future receivables.
Setting up Flutterwave + Sage Integration
Sync the information from your Flutterwave account to Sage to keep track of your sales and the money Flutterwave owes you. You can select the appropriate accounts from your Chart of Accounts to track sales and Flutterwave fees.
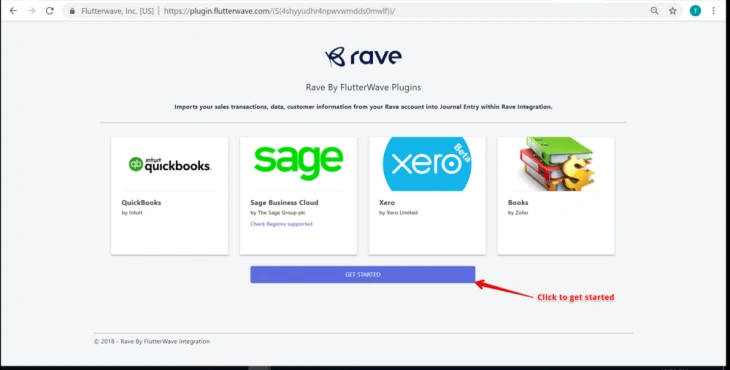
To get started, follow the link: https://plugin.flutterwave.com.
-
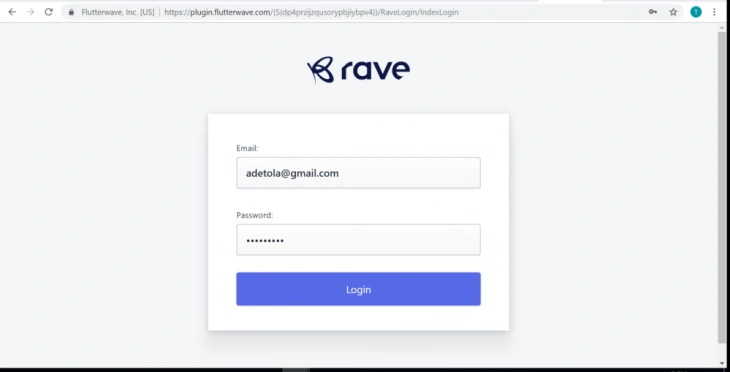
After clicking “GET STARTED”, the next page navigates you to Flutterwave log in page. You will be asked to enter your Flutterwave credentials to connect Sage.
-
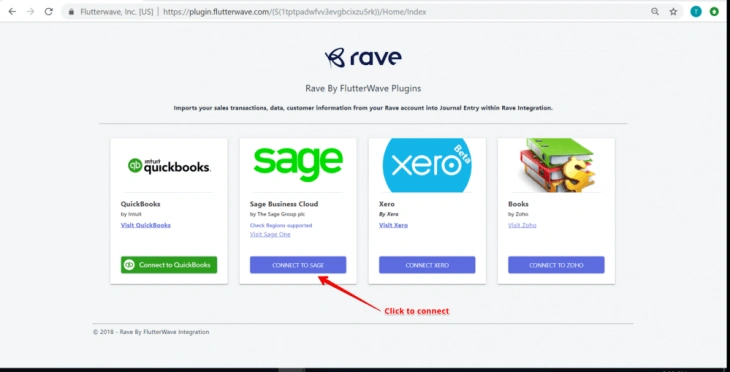
Click on “Connect to Sage” to connect Sage.
-
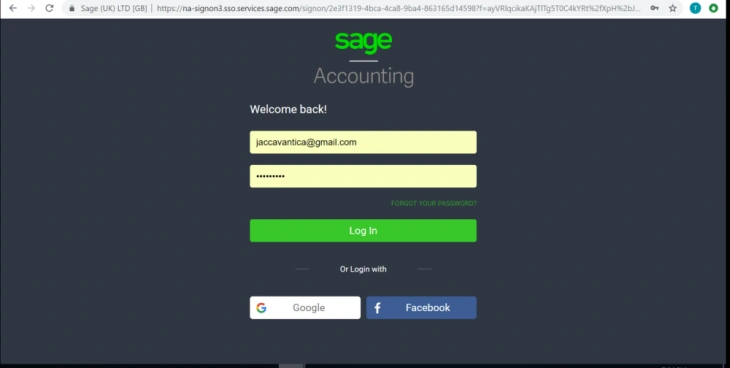
The next page navigates you to Sage Login page where you will be required to enter your sage log in details.
-
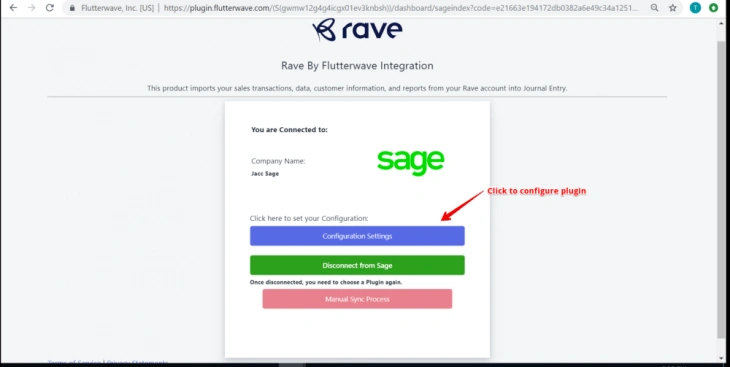
Configure settings by clicking on “Configuration Settings”.
-
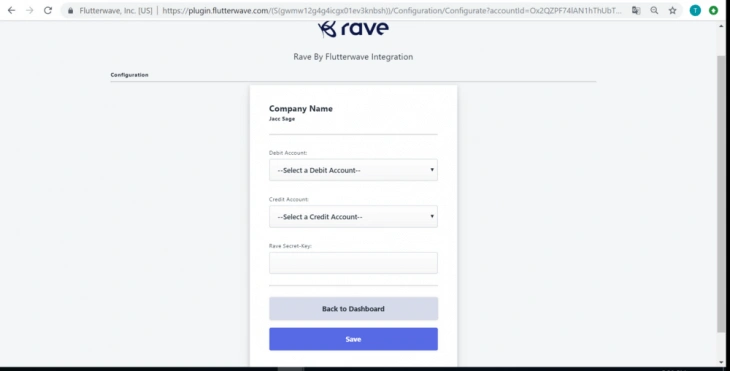
On the next page, select appropriate credit and debit account to track fees and sales and save. Click on “Back to Dashboard” to return.
-
Click “Back to Dashboard to return.
-
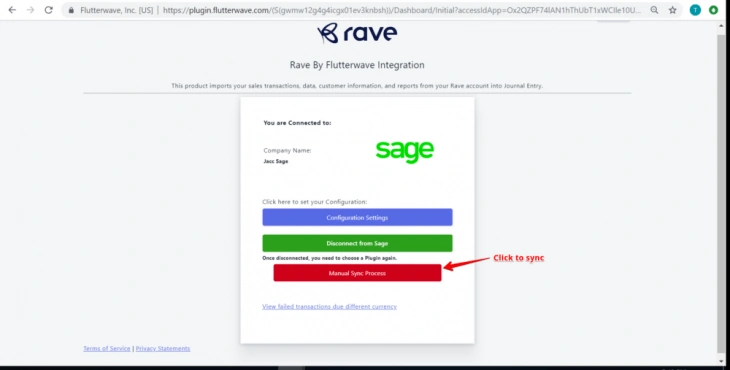
Sync Flutterwave transactions on Sage by clicking on “Manual Sync Process”.
-
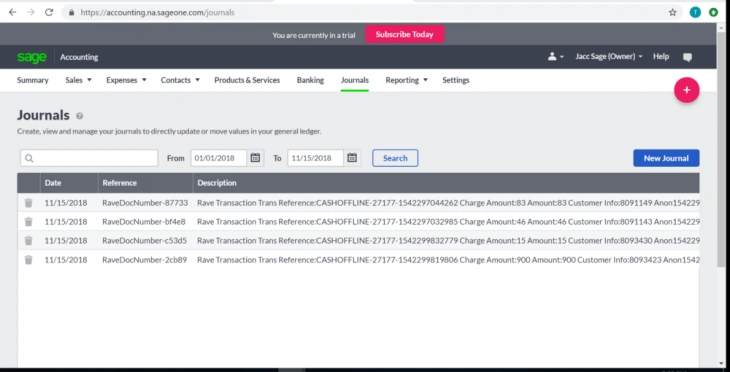
Go to Sage the “Journals” menu to view synced transactions in the appropriate accounts selected previously.
Clicking on one of the transactions shows more details about selected transaction.


If you still need support, please visit our support knowledgebase.
Ready to get started?
Create an account and instantly start accepting payments, selling your beautiful products online and building financial tools.