How to Whitelist IP Addresses on Your Flutterwave Dashboard
Updated 10 months ago
Want to add an extra layer of security and control to your Flutterwave payouts? Whitelisting specific IP addresses is the way to go! Here's how to do it directly from your Flutterwave dashboard
Click on 'Settings' on your dashboard.
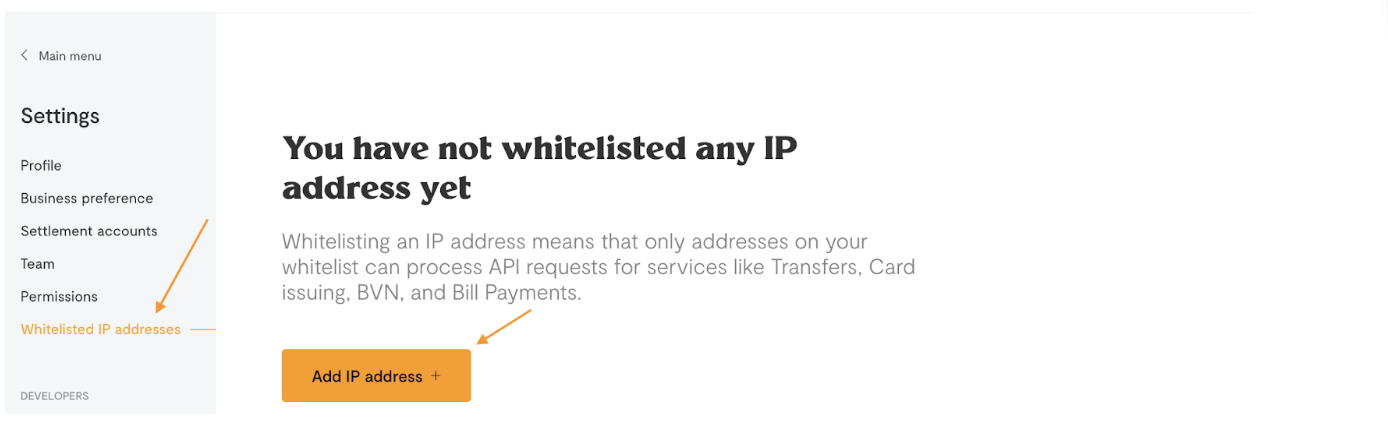
Then, click on 'Whitelisted IP addresses'.
Click on "Add IP Address" and enter the IP address you want to whitelist.
Pick your preferred IP add ress format from the drop-down. We support both IPv4(e.g.192.168.1.1) and IPv6(e.g. 2001:0db8:85a3:0000:0000:8a2e:0370:7334) formats.

You will receive an OTP via email or WhatsApp to complete the setup.


It’s important to note that you always have control over the whitelisted IP addresses. You can revoke authorization anytime by removing IP addresses from the whitelist.
For a visual guide on how to whitelist IP addresses, check out this helpful YouTube video.
IP formatting rules
After specifying which IP to whitelist, the following formatting would be applied to them on your dashboard:
Leading zeros would be removed from each segment, e.g. `
2001:0db8:0:0:0:0:0:00001` would be formatted to 2001:db8:0:0:0:0:0:1
Segments containing four zeros are compressed to a single `0`. e.g. `2001:db8:0000:0000:0000:0000:0000:0001` would be formatted to 2001:db8:0:0:0:0:0:1
We retain the trailing zeros unless they are part of a zero-only segment. e.g. `2001:db80:0000:0000:0000:0000:0000:0001
` is formatted to 2001:db80:0:0:0:0:0:1.
We'd like to hear from you
Suggest the type of support articles you'd like to see
Still need help?
Get in touch if you have more questions that haven’t been answered here