Integrating Flutterwave's WordPress payment forms
Updated 43 months ago
Follow the steps below to connect Flutterwave's payment plugin with your WordPress account.
Log into your store's WordPress Admin dashboard and click Plugins on the left-hand side menu.
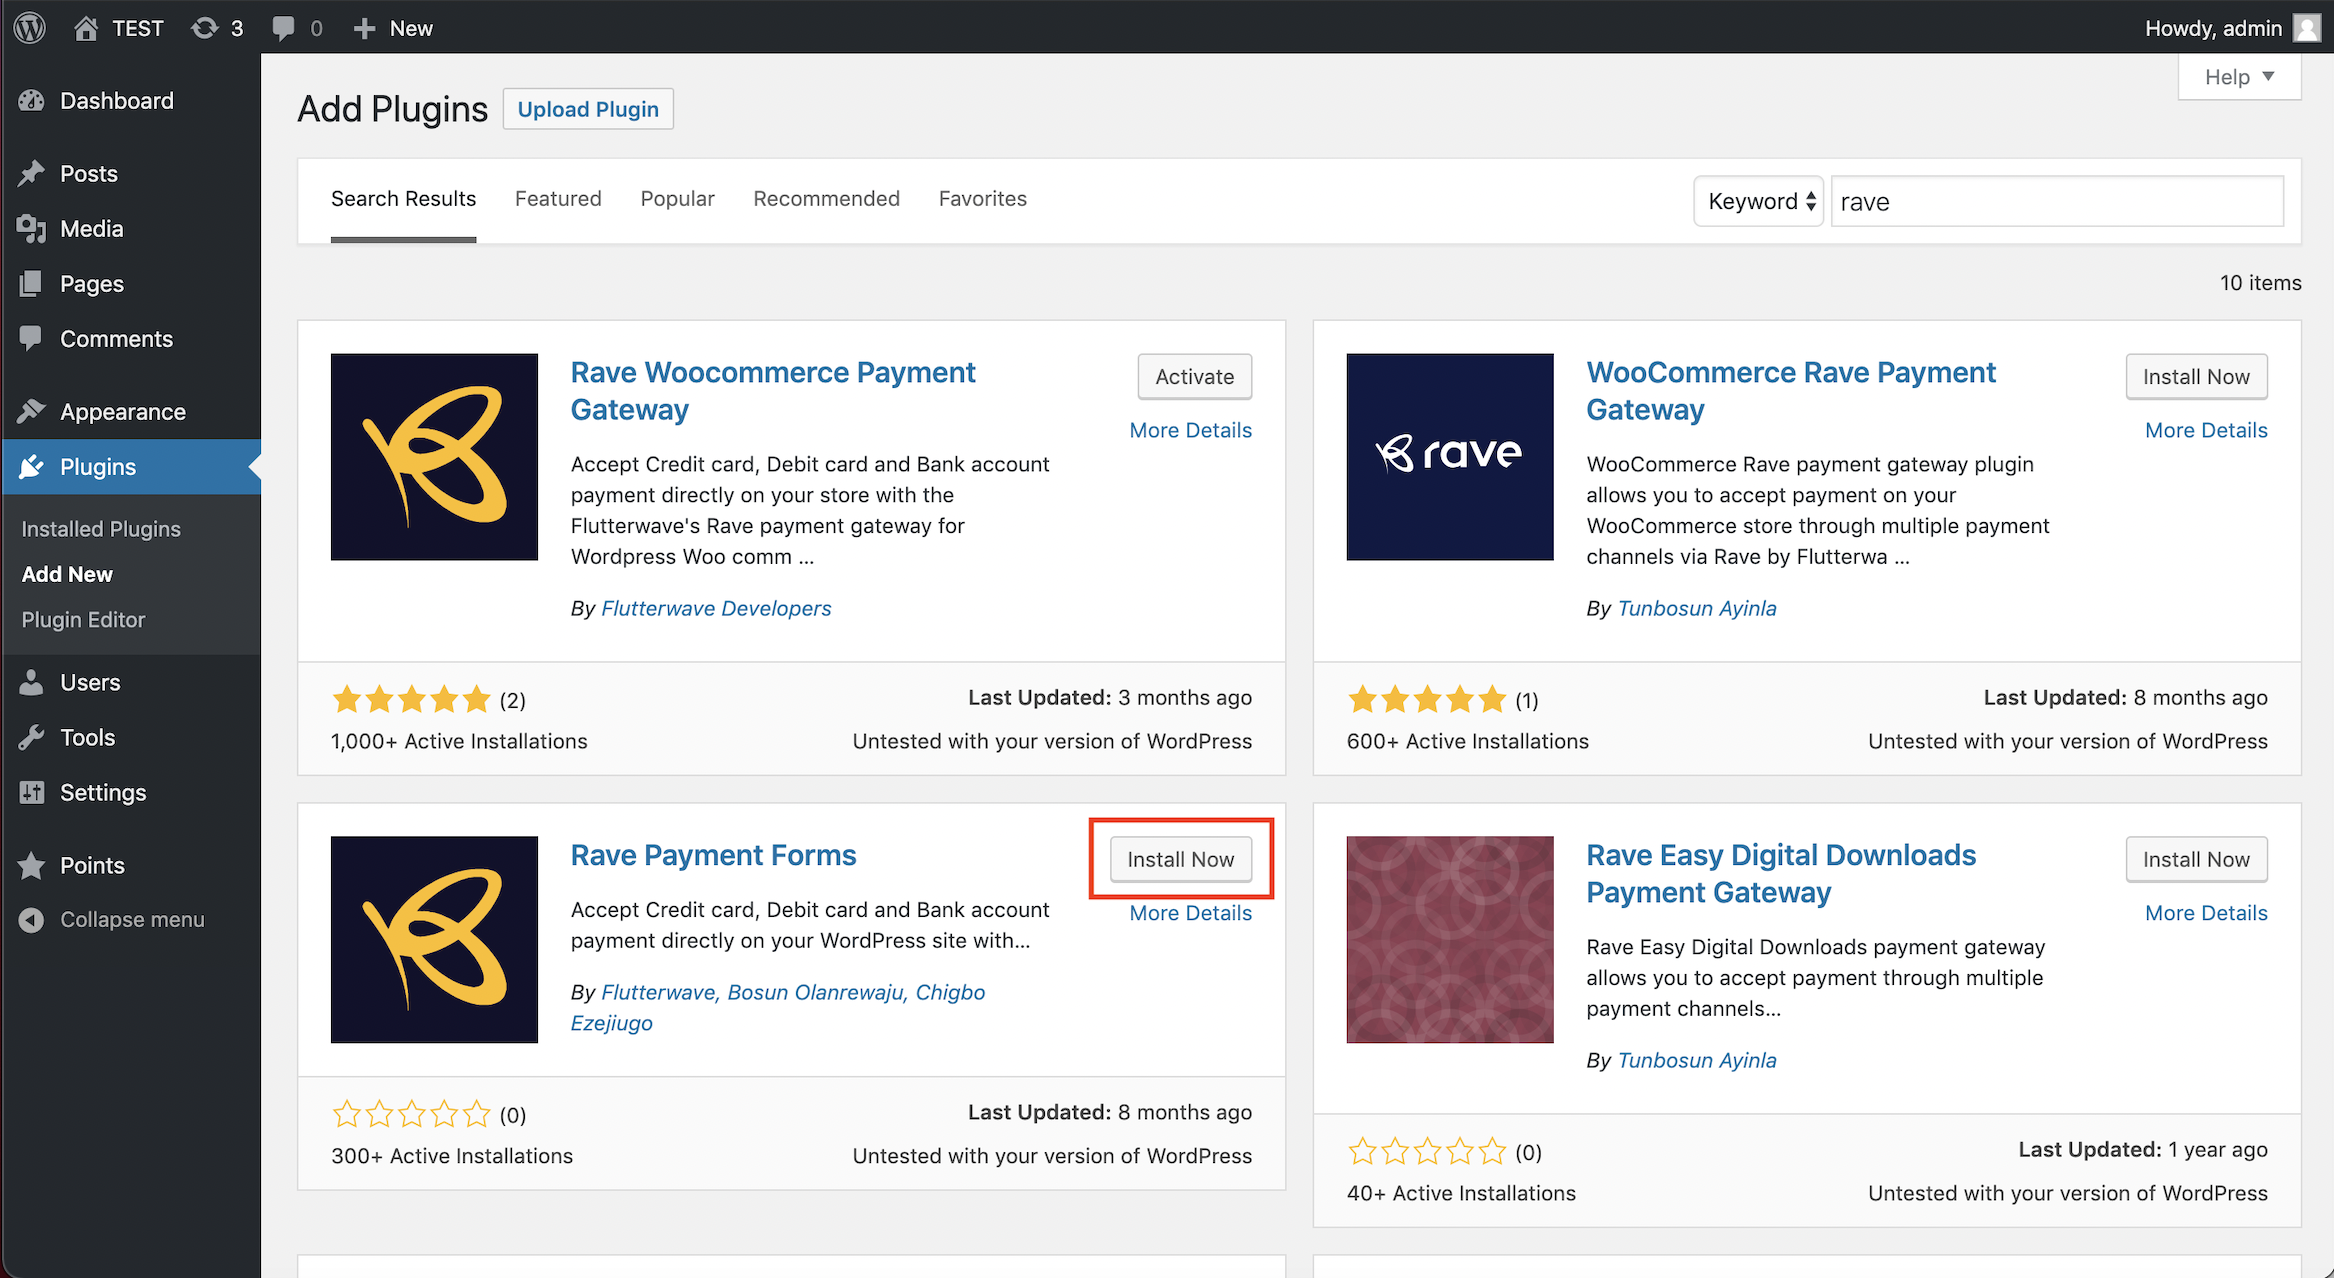
On the dropdown below, click the "Add new" button.
Search for Flutterwave Payment Forms and click the "Install Now" button on the Rave Payment Forms plugin by Flutterwave.
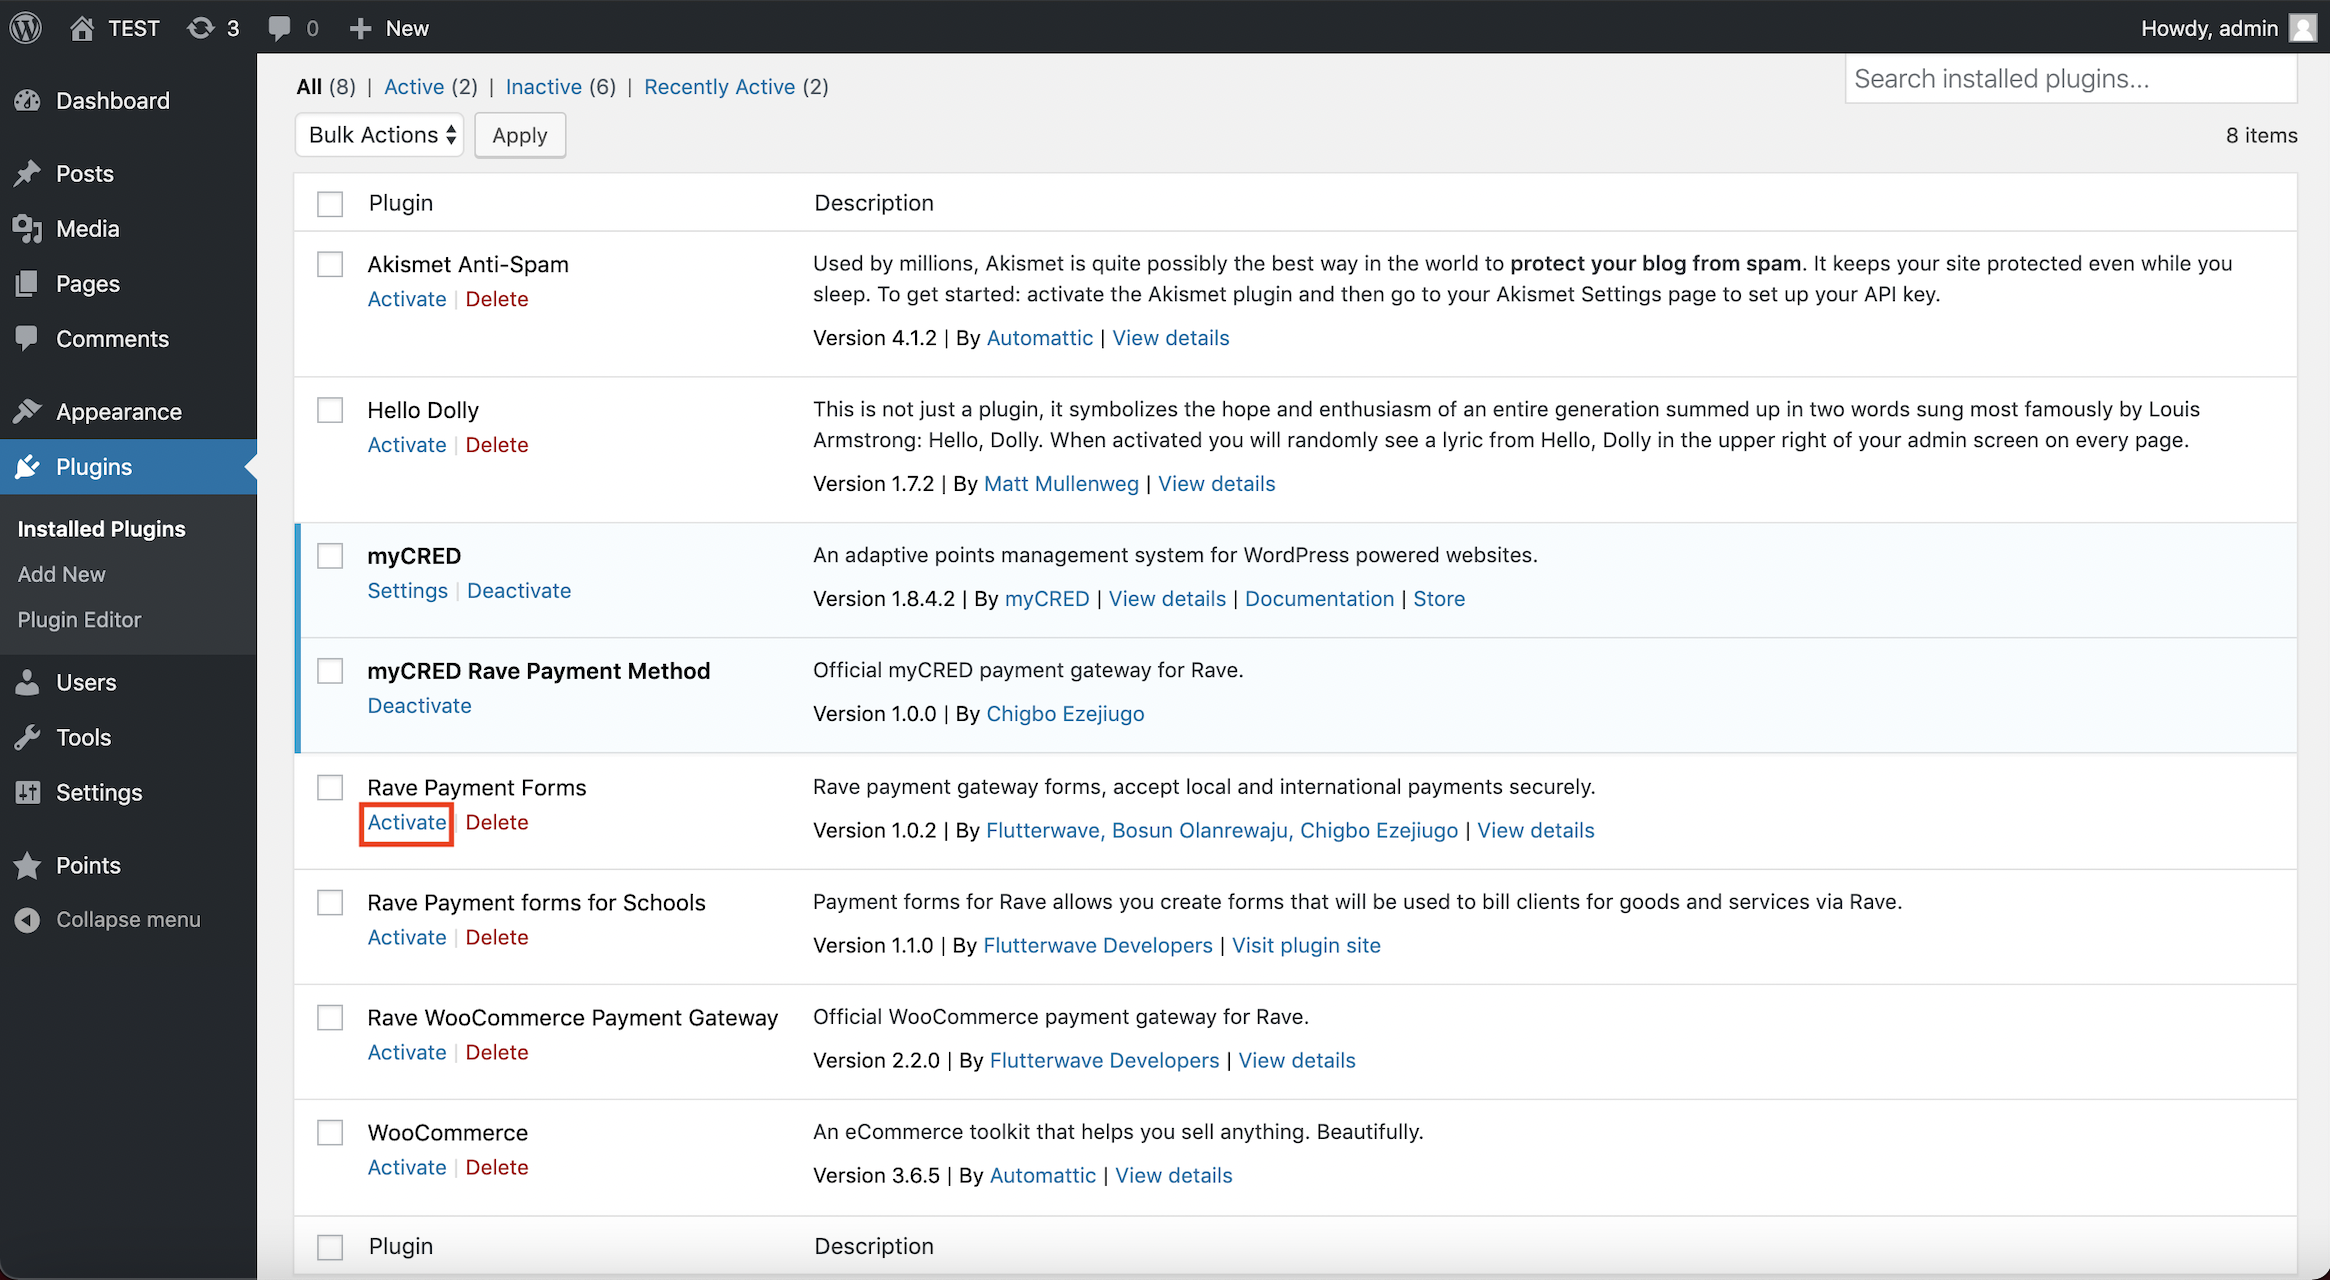
4. Under Plugins on the left-hand side menu, click on Installed Plugins. Activate the recently installed Rave Payment Forms plugin.
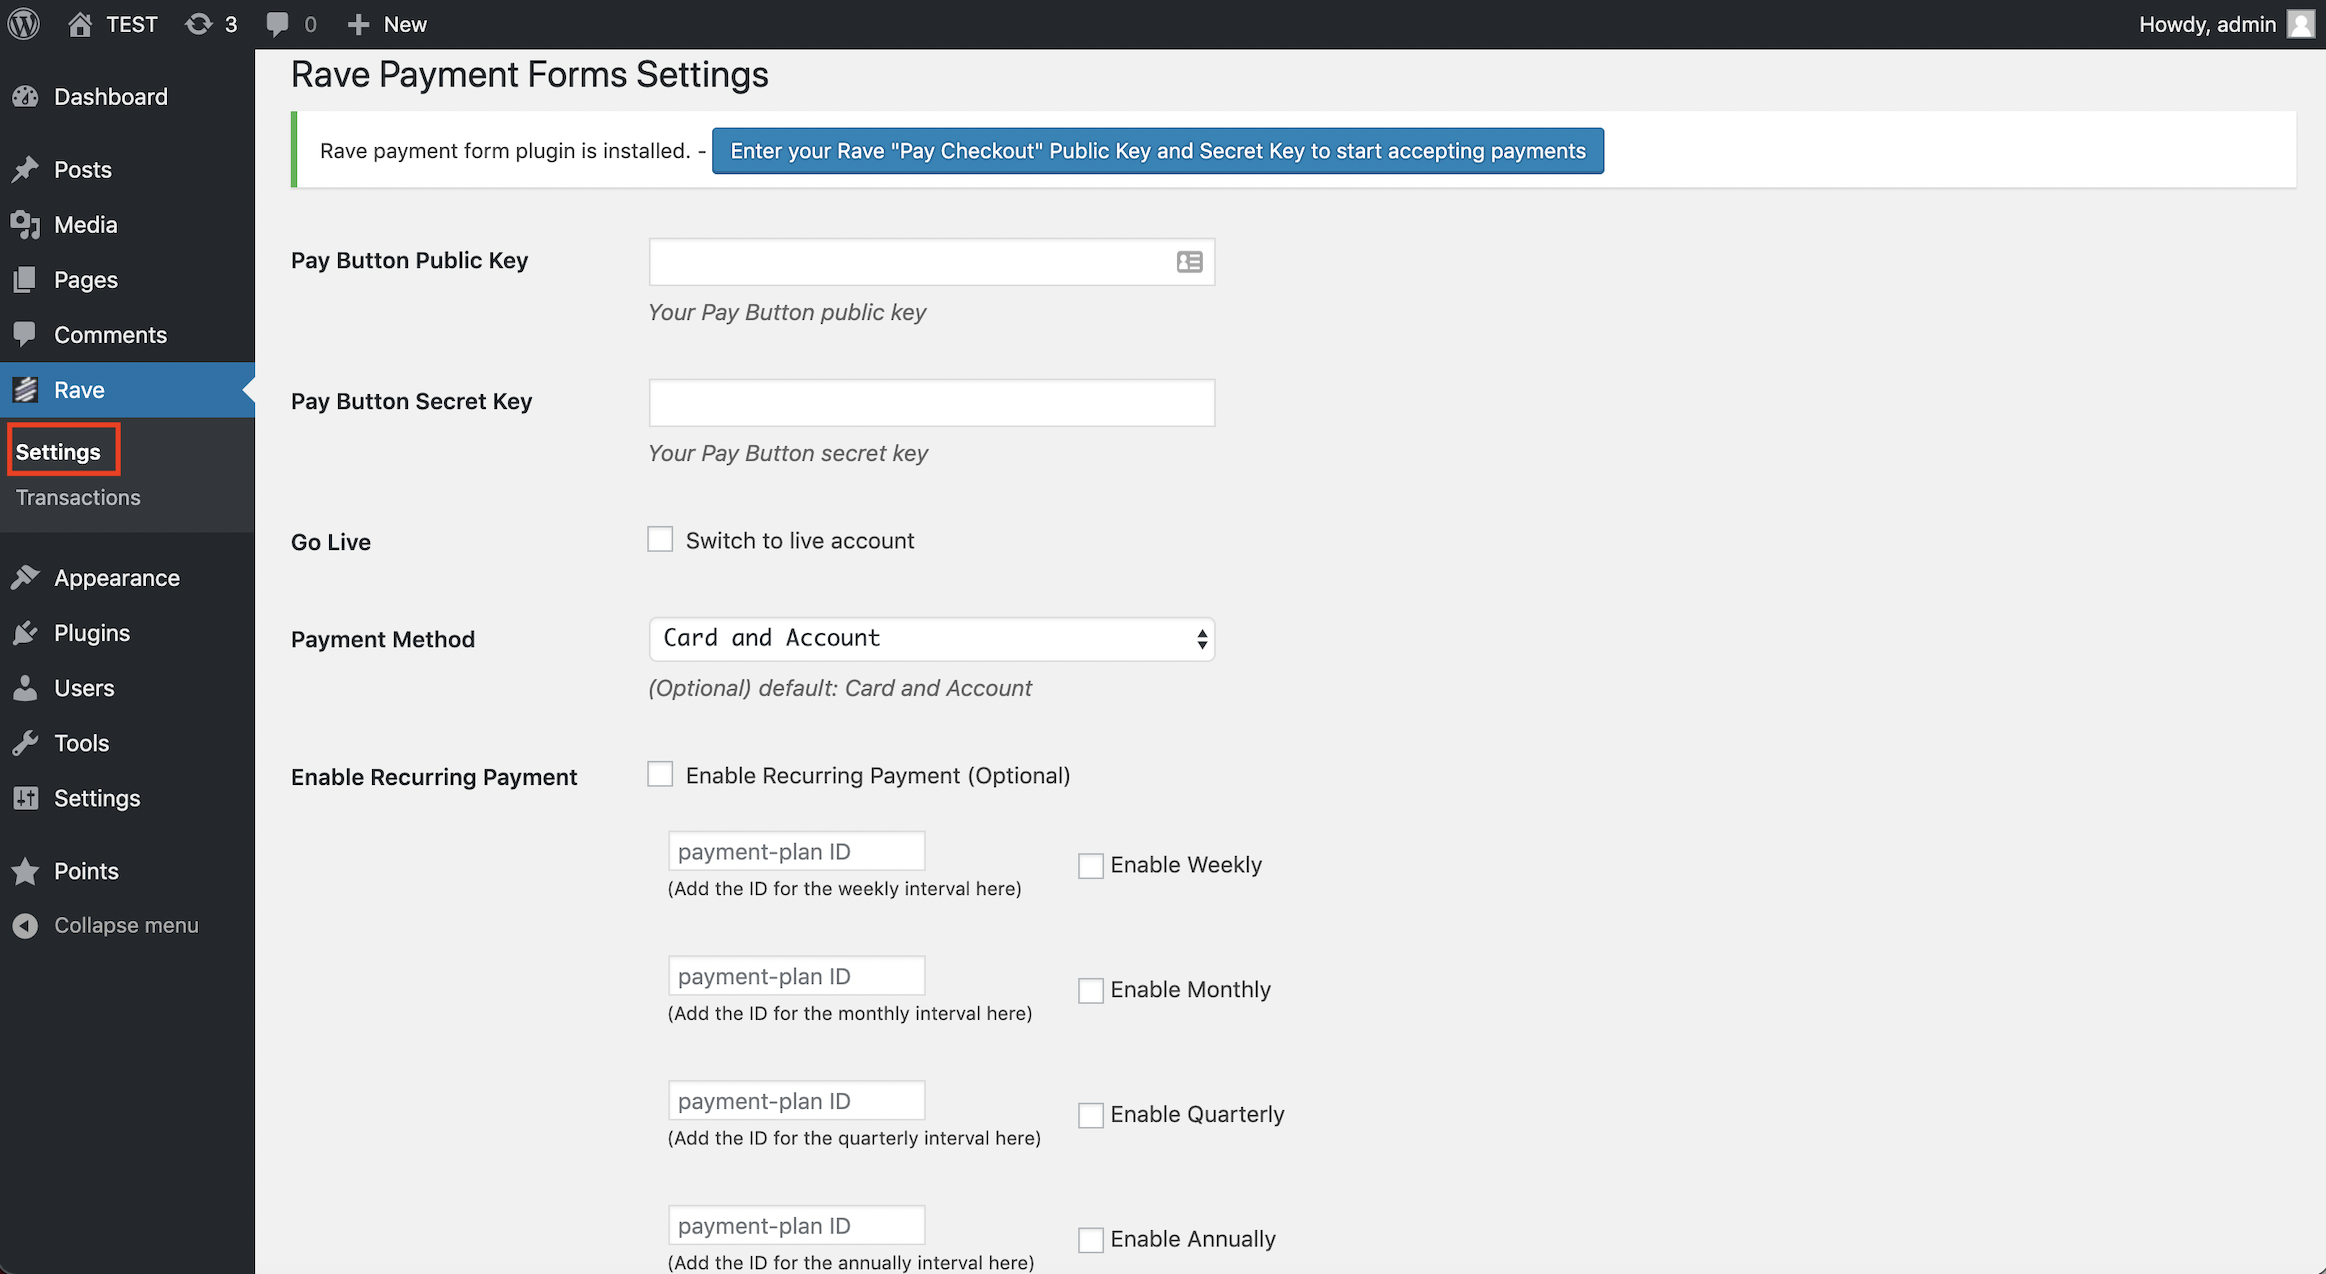
5. Click Rave > Settings from the left menu and configure your settings accordingly.
Rave Payment Form Usage
You can insert certain shortcodes anywhere on your page or post where you want the form to be displayed to customers. See a list of shortcodes and their usage below:
Basic: requires the user to enter amount and email to complete payment
[flw-pay-button]With button text:
[flw-pay-button]Button Text[/flw-pay-button]With attributes: email or use_current_user_email with value "yes", amount
[flw-pay-button amount="1290" email="customer@email.com" ]or[flw-pay-button amount="1290" use_current_user_email="yes" ]With attributes and button text: email, amount
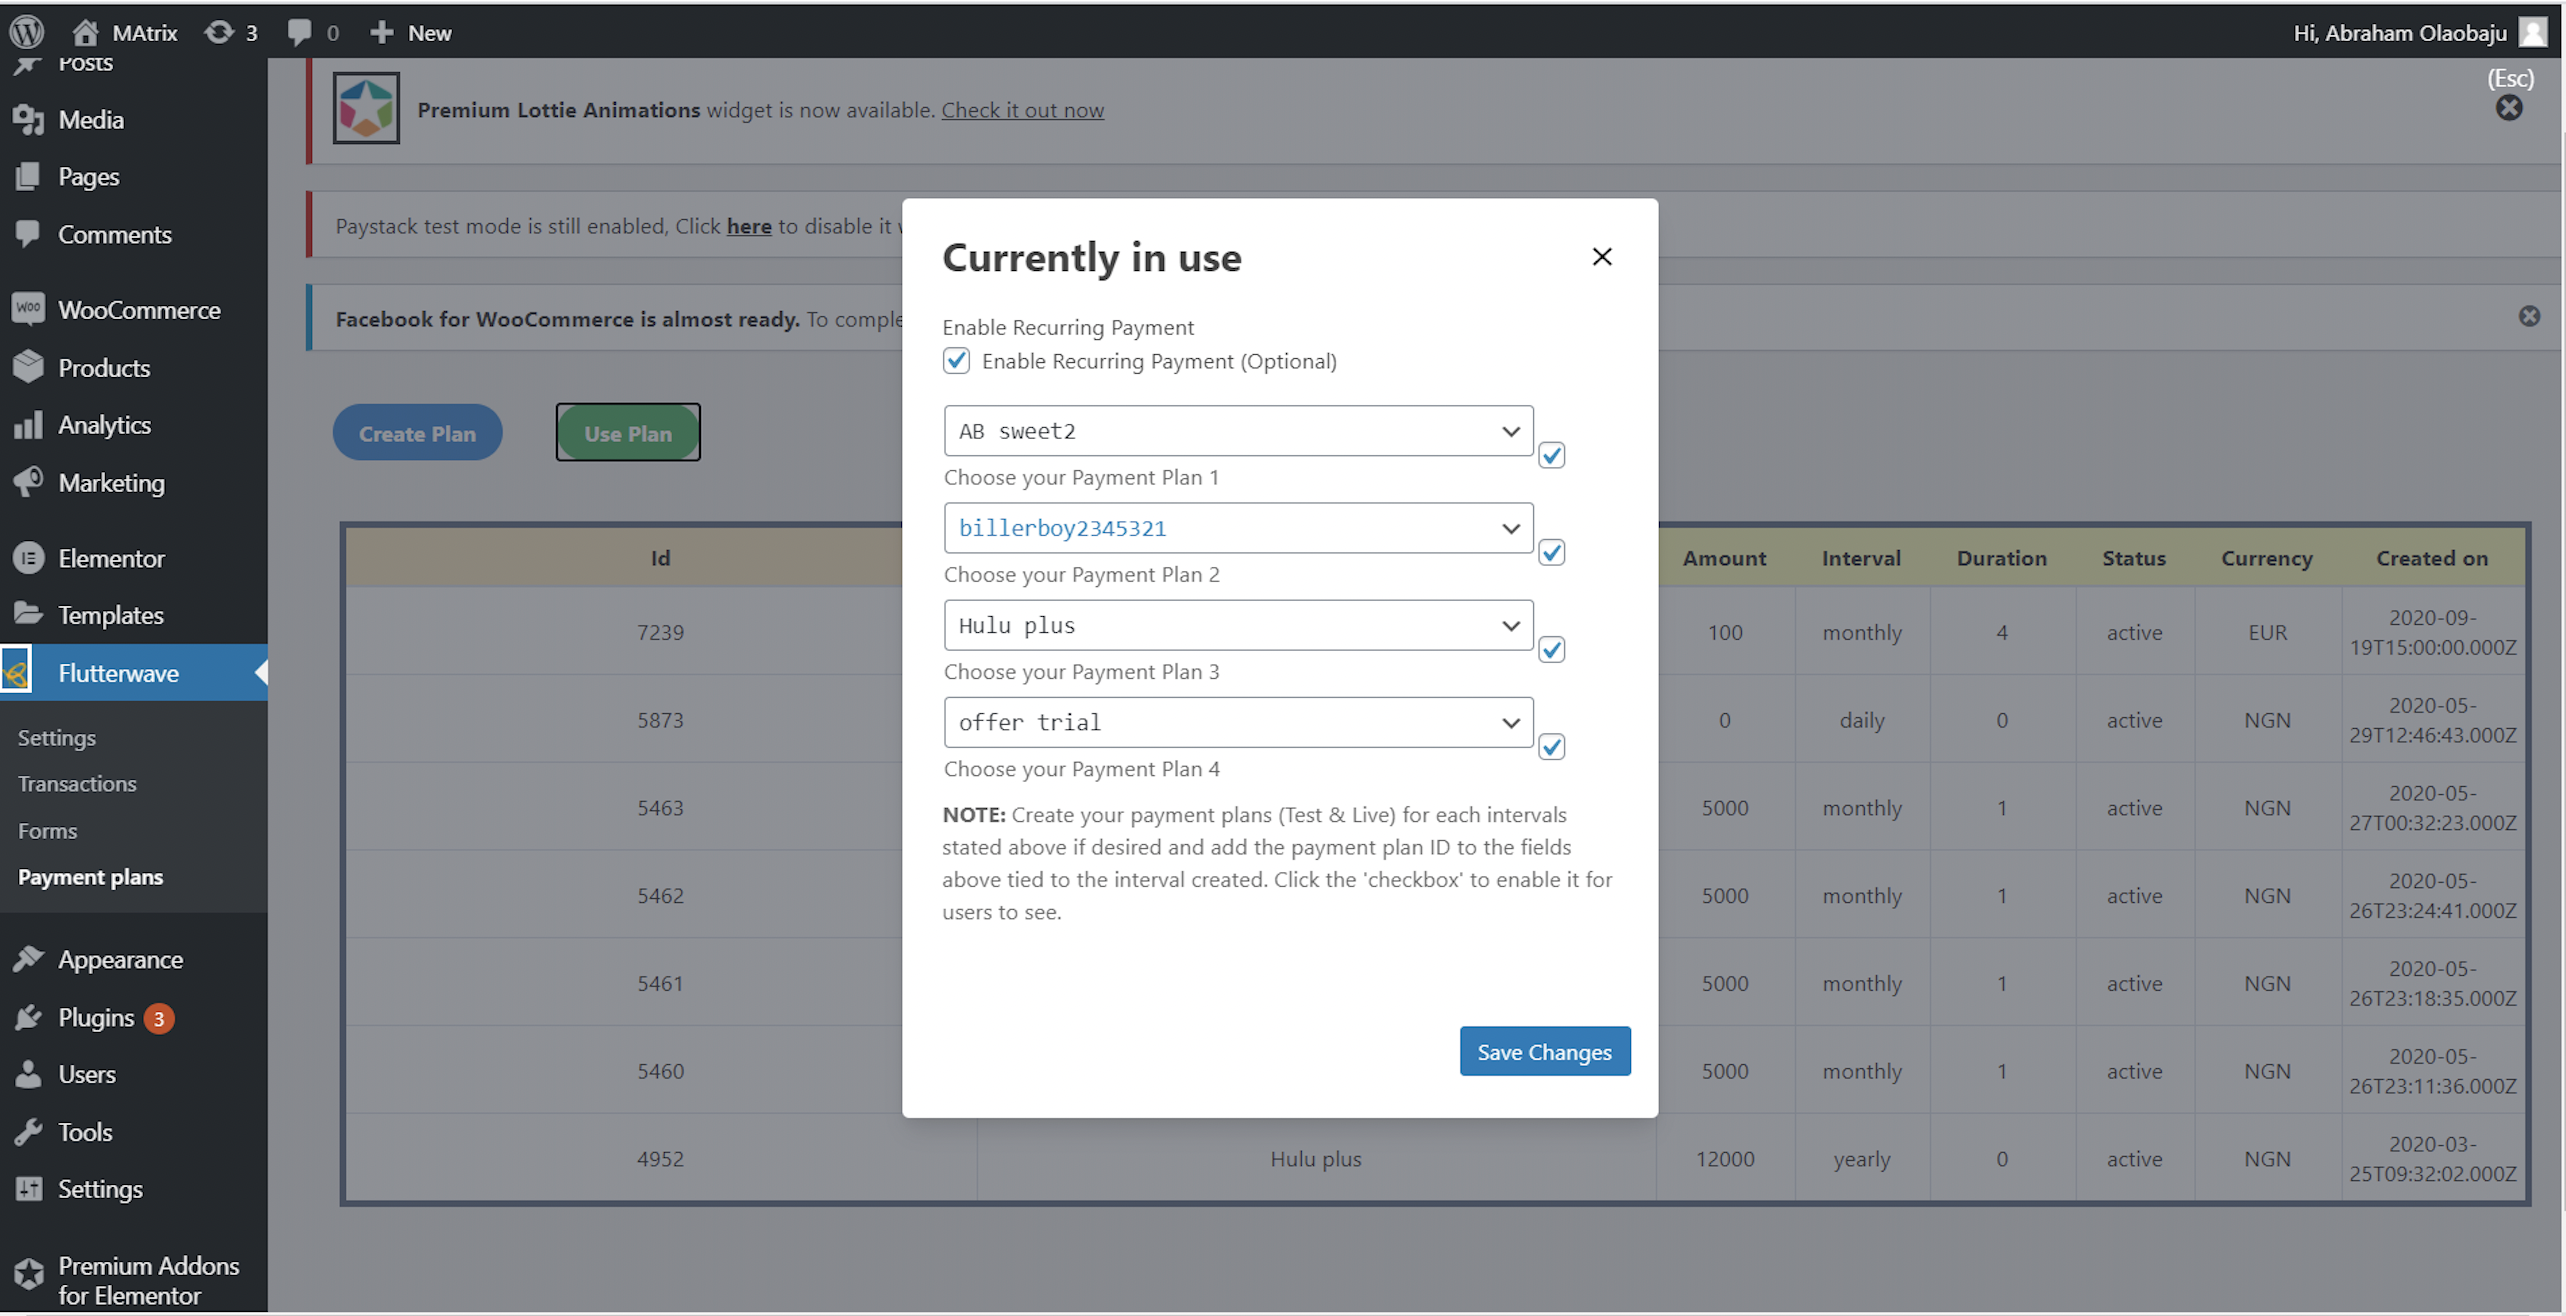
With a shortcode, you can add a payment plan to your form.
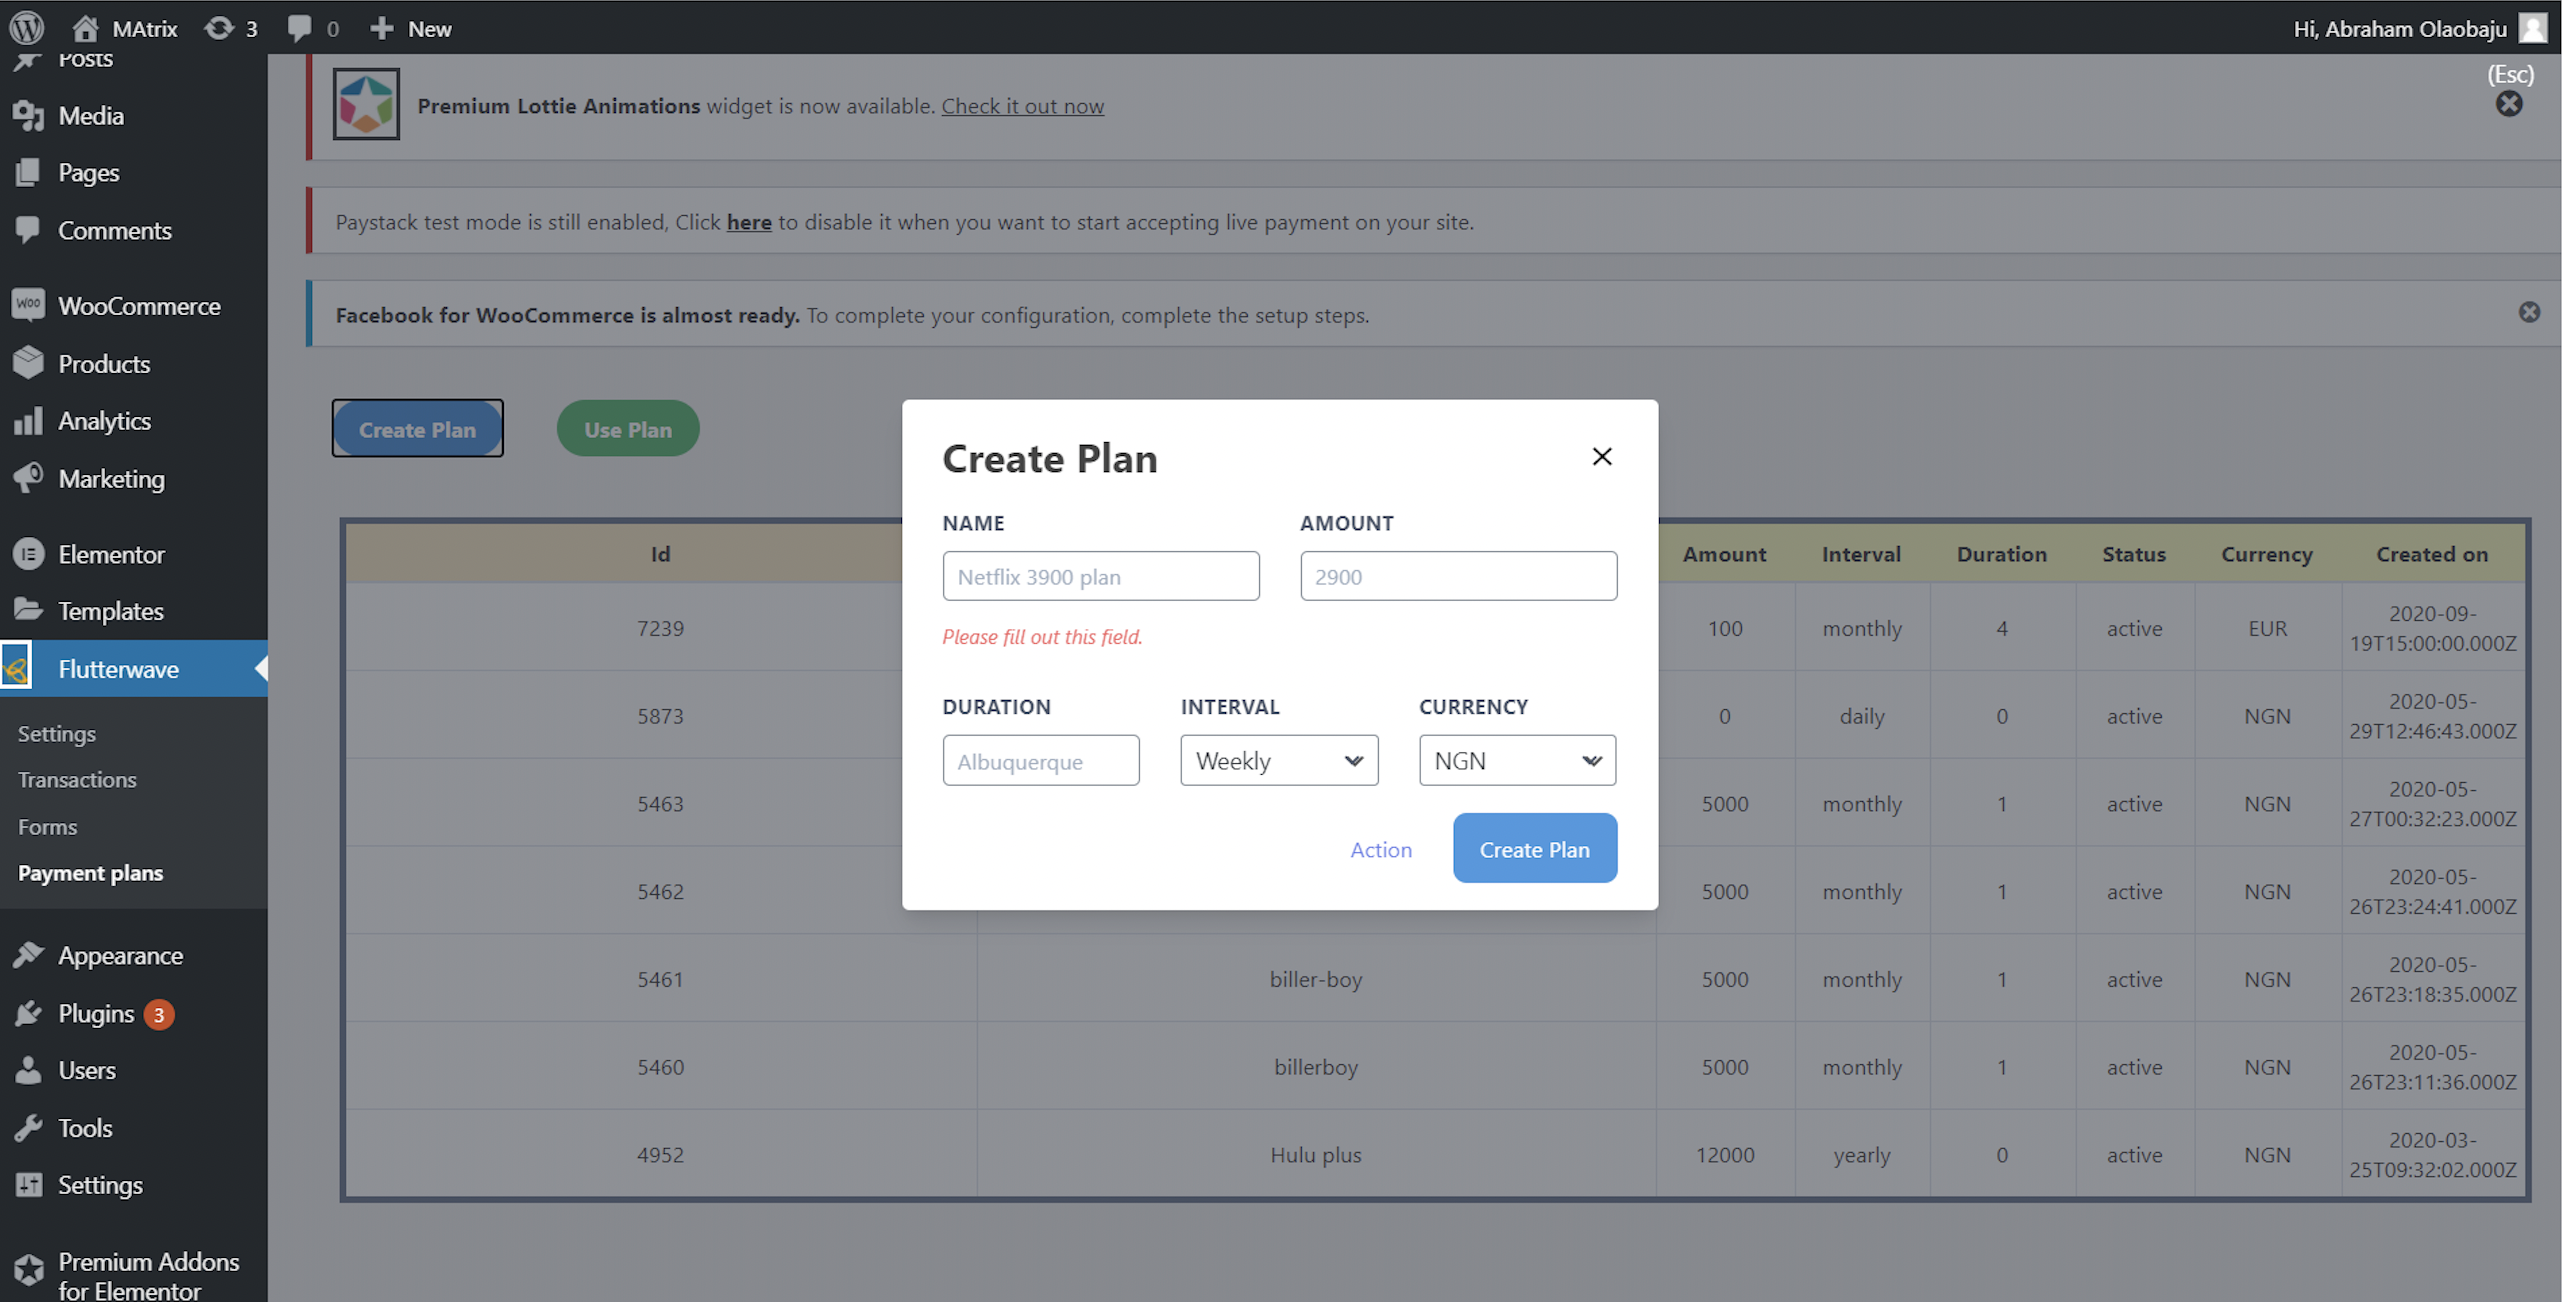


You can also enable recurring payments and select payment plans to be added to the payment form.
We'd like to hear from you
Suggest the type of support articles you'd like to see
Still need help?
Get in touch if you have more questions that haven’t been answered here