
The safety and security of your funds is of utmost importance to us here at Flutterwave. This is why we are continuously looking for innovative solutions to better secure our customers’ funds with us. We are happy to introduce three new security features to better protect your funds from fraud on our Flutterwave For Business product.
IP Whitelisting For API Payouts
This functionality gives you control over who can access your Flutterwave account to process payouts (transfers from your account to banks, mobile money or any other Flutterwave account) via the API.
To do this, you need to compile a list of trusted IP addresses that should have access to process payouts on your Flutterwave account. Then, you’ll add the compiled trusted list to your account. This will ensure that payouts from your Flutterwave account are restricted to only the whitelisted IPs you have set up.
How To Whitelist IPs On Your Dashboard
- Log into your Flutterwave Dashboard
- Click “Settings” on the left panel
- Click “Whitelisted IP Addresses”

- Click “Add Whitelist IP”
- You can add or edit Whitelisted IPs
To ensure you are the one making the change, we will send a One-Time Password (OTP) to your email and WhatsApp each time to complete the flow.
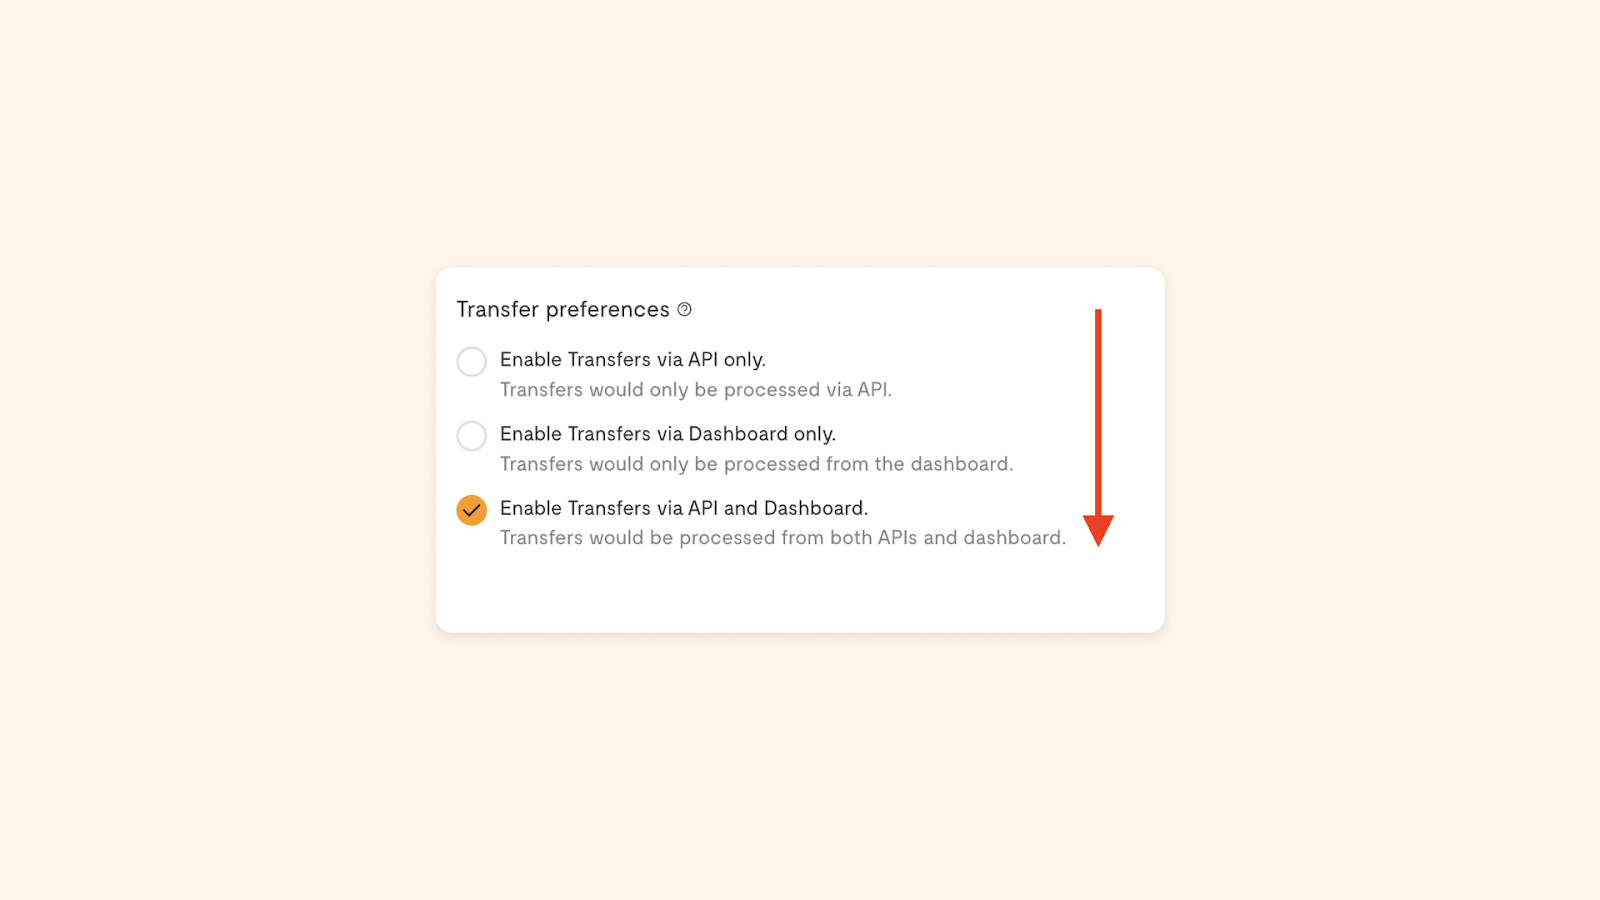
Toggle For Payout Source
On your Flutterwave for Business account, you can process payouts from your Dashboard, API or both. This new feature allows you to select where you want to process payouts from. You can select either Dashboard, API or both. It is important to note that if only Dashboard is selected, all payouts from API will fail and vice-versa.
How To Set Up Toggle Payout Source On Your Dashboard
- Log into your Flutterwave Dashboard
- Click on “Settings” on the left panel
- Click on “Business preference”
- Click on “Security” at the top of the page

- Click your preference on the list.
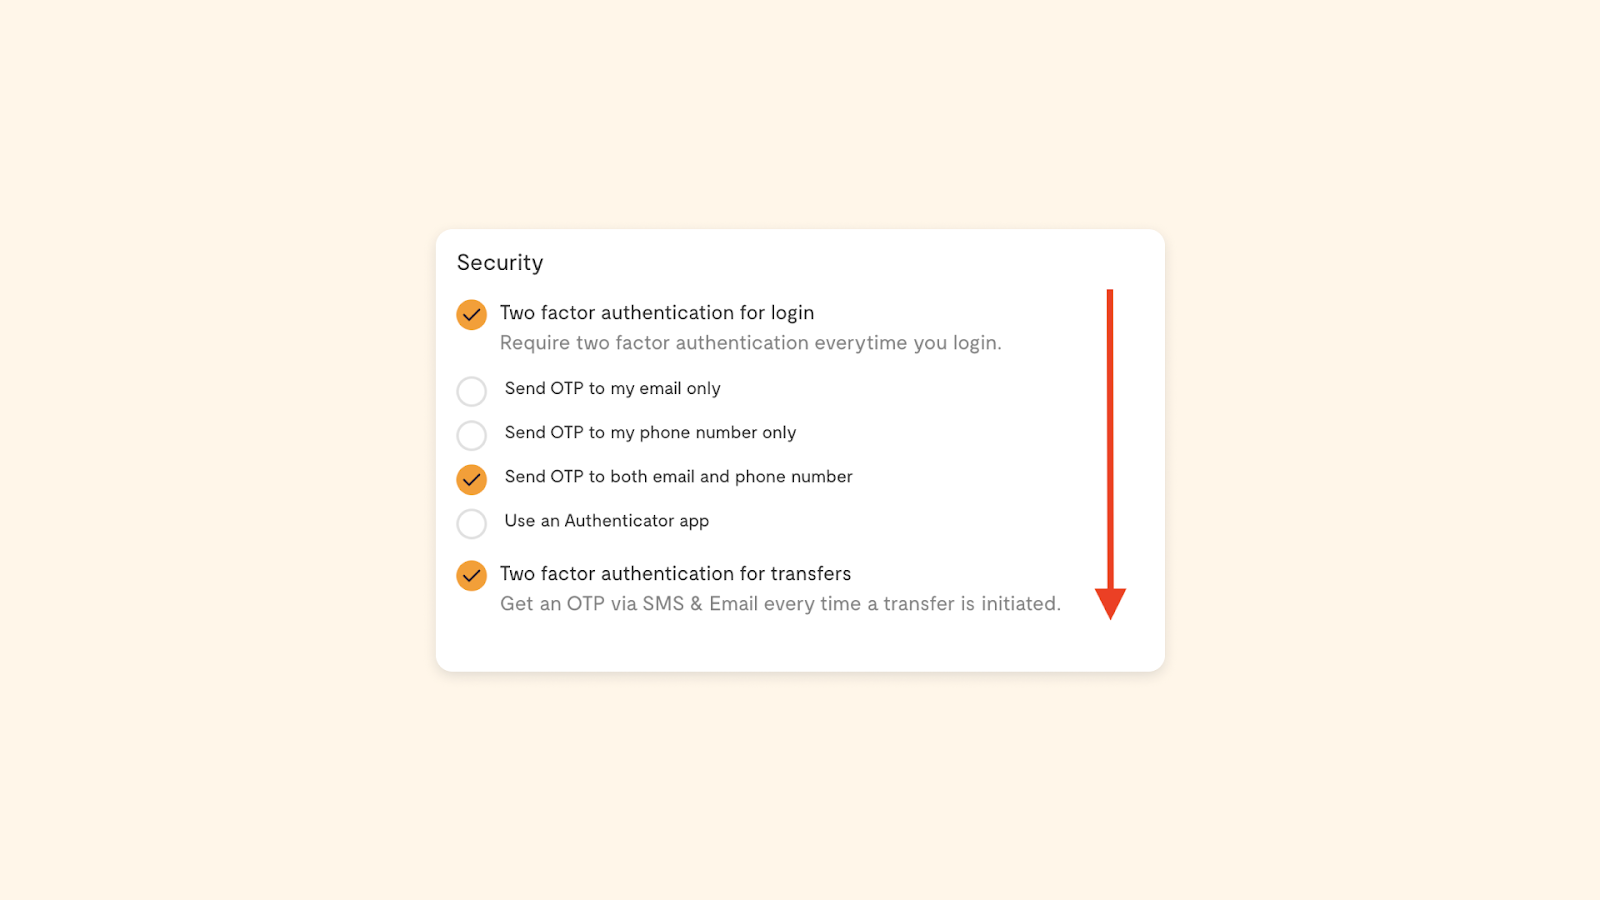
2-Factor Authentication For Login & Transfers
2FA is an extra layer of security we have introduced to access your Flutterwave account. This feature requires an additional credential to prove you are the one accessing your account each time you attempt to log in. After providing the email address and password to your account, you will be required to provide another credential like OTP (One-Time Password), fingerprint or token. You can learn more about 2FA in this detailed article we wrote about it.
How To Set Up 2FA On Your Dashboard
- Log into your Flutterwave Dashboard
- Click on “Settings” on the left panel
- Click on “Business preference”
- Click on “Security” at the top of the page
- Enable Two Factor Authentication for both Login & Transfers
- Choose your preferred option for the 2FA
- If you choose the “Authenticator App” option, follow the prompts to link your Flutterwave account with the Authenticator app of your choice.
As a company that understands the importance of security and trust, we’ll keep innovating to ensure your business and customers are protected against fraudsters and other risks.